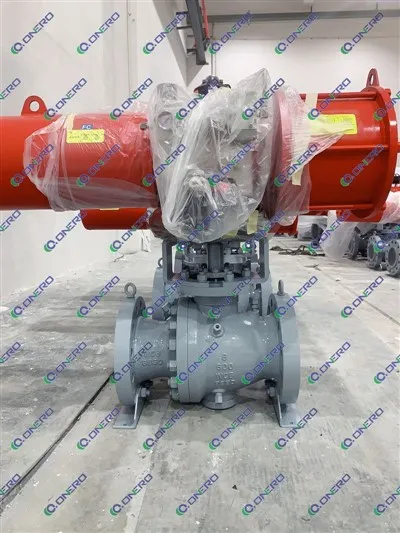
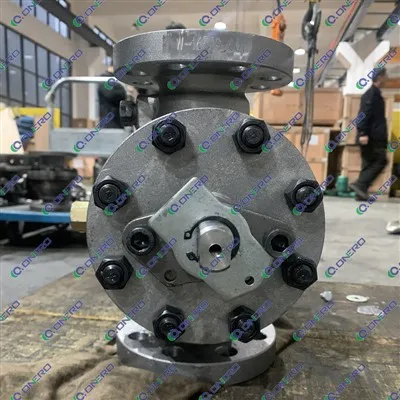
Hey there! As a supplier of Top Entry Ball Valves, I know how crucial it is to ensure that these valves are in top - notch condition before they're put to use. So, today I'm gonna walk you through the process of inspecting a new Top Entry Ball Valve.
1. Pre - inspection Checks
First things first, when the valve arrives, give it a quick once - over right out of the box. Check the packaging for any signs of damage during transit. If there are dents, tears, or other visible issues with the box, it could be a red flag that the valve inside might have suffered some harm too.
Next, look at the valve's exterior. Check for any obvious scratches, dents, or corrosion. Even small surface imperfections can sometimes indicate more serious internal problems. Make sure all the nameplates and markings are legible. These markings usually contain important information like the valve's size, pressure rating, and material specifications. You can refer to the Top Entry Trunnion Ball Valve product page for more details on what to expect in terms of markings and specifications.
2. Visual Inspection of Components
Let's start with the body of the valve. The body should be free from cracks. You can use a flashlight to get a better look at hard - to - reach areas. Pay close attention to the welds if it's a welded valve. Any signs of porosity, lack of fusion, or undercut in the welds can compromise the valve's integrity.
The ball inside the valve is a key component. It should be smooth and free from any pitting or scoring. Rotate the ball gently by hand. It should turn smoothly without any excessive resistance or binding. If you feel any roughness or if it gets stuck at certain points, there might be an issue with the ball's surface or the seating arrangement.
The seats are another critical part. They should be clean and free from debris. Check for any signs of wear, such as uneven surfaces or grooves. A damaged seat can lead to leaks, so it's essential to ensure they're in good condition.
The stem is responsible for actuating the ball. Inspect it for straightness. A bent stem can cause problems with the valve's operation. Also, check the threads on the stem. They should be clean and undamaged to ensure proper connection with the actuator.
3. Checking the Sealing
One of the most important aspects of a ball valve is its sealing performance. You can perform a simple visual check for any signs of external leakage around the valve body, bonnet, and stem packing. If you notice any wet spots or signs of fluid seepage, that's a clear indication of a sealing problem.
For a more in - depth check, you can use a pressure test. But before you do that, make sure the valve is properly installed in a test fixture. You can use a low - pressure air or water test. For air testing, slowly increase the pressure to the recommended test pressure and hold it for a specific period, usually around 5 - 10 minutes. Listen for any hissing sounds, which could indicate an air leak. For water testing, look for any visible water droplets or streams.
4. Examining the Actuator (if applicable)
If the Top Entry Ball Valve comes with an actuator, it needs a thorough inspection too. Check the actuator's housing for any damage. The mounting bolts should be tight, and there should be no signs of looseness.
Test the actuator's operation. If it's an electric actuator, make sure it powers on and off correctly. Check the limit switches to ensure they're functioning properly. For pneumatic actuators, check for any air leaks in the tubing and connections. The actuator should be able to open and close the valve smoothly and precisely.
5. Documentation Review
Don't forget about the paperwork! Review the valve's documentation, including the certificate of conformance, material test reports, and operating instructions. The certificate of conformance should confirm that the valve meets the specified standards and requirements. The material test reports will tell you about the quality and composition of the materials used in the valve. Make sure all the information in the documentation matches what you see on the valve itself.
6. Comparing with Specifications
Compare the valve you're inspecting with the original purchase specifications. Check the size, pressure rating, end connections, and material. For example, if you ordered a 3 Way Ball Valve Carbon Steel, make sure the valve you received is indeed a 3 - way valve made of carbon steel with the correct pressure rating and end connections.


7. Final Checks and Cleaning
After you've completed all the inspections, give the valve a final once - over. Make sure all the parts are properly tightened and that everything is in place. If there was any debris or dirt found during the inspection, clean the valve thoroughly. You can use a clean, dry cloth or a mild cleaning solution for this purpose.
If you're satisfied with the inspection results, the valve is ready for installation. But if you find any issues, it's important to address them right away. You can contact us for further assistance or to arrange for a replacement if necessary.
Conclusion
Inspecting a new Top Entry Ball Valve is a multi - step process that requires attention to detail. By following these steps, you can ensure that the valve you're using is in excellent condition and will perform reliably. Whether you're in the oil and gas industry, water treatment, or any other field that uses ball valves, proper inspection is key to avoiding costly downtime and maintenance issues.
If you're in the market for high - quality Top Entry Ball Valves or need more information on how to inspect them, feel free to reach out. We're here to help you make the right choice and ensure your valves are in top shape. You can also check out our Stainless Lockable Ball Valve product line for more options.
References
- Valve Inspection Handbook - A comprehensive guide on valve inspection procedures and best practices.
- Industry Standards for Ball Valves - Documents published by relevant industry organizations that outline the requirements for ball valve manufacturing and inspection.